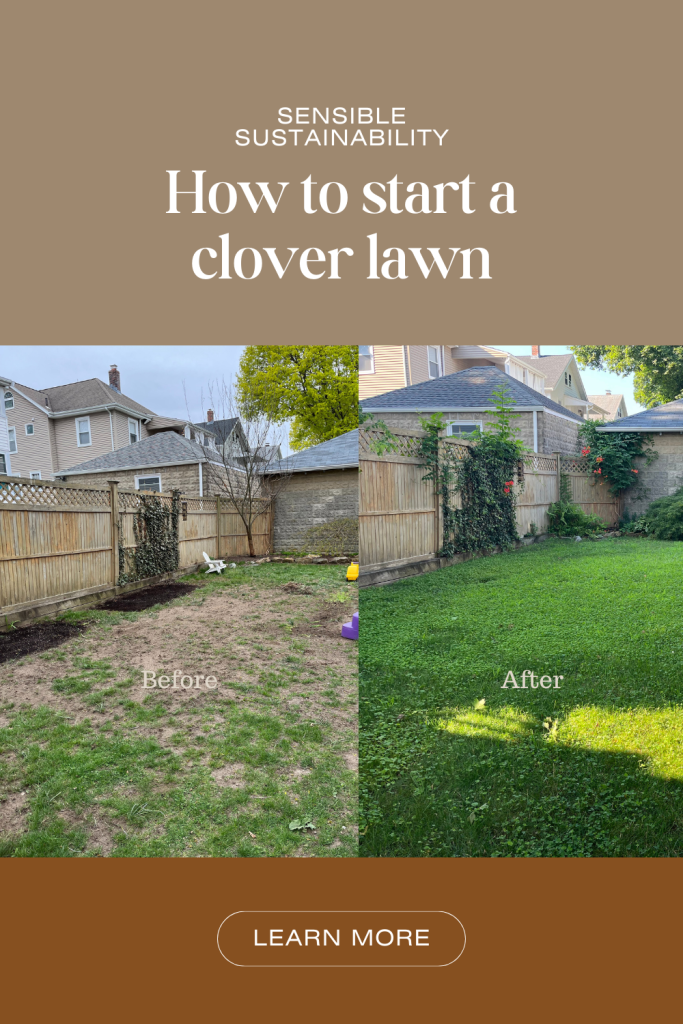
I’ve tried to start a clover lawn several times in our last backyard, and it never worked. This spring, when our backyard was bare from a renovation project, I knew it was time to put some serious effort into cultivating a clover lawn instead of tossing some seeds and hoping for the best. Now six months in, I’m pretty happy with how it turned out. So here are some notes and photos to show you the process!
Why clover?
Many people consider clover a weed, but it’s actually an amazingly resilient and low-maintenance grass alternative. Clover’s reputation as a weed is fairly recent, as clover was commonly included in lawn seed blend back in the day (so I hear!). Not only does a clover lawn require less watering and mowing, it also attracts pollinators and feeds wildlife – a huge pro for my garden (I would much prefer bunnies that munch on my lawn than my seedlings!). Clover also adds nutrients to the soil through nitrogen fixation and stays green nearly all summer long, even in a drought. In short, if a lawn makeover is in your future, clover is something you should seriously consider!
The process
Many people make a seed blend that includes clover for their backyard, but we’ve tried several kinds of grass seeds in the last two years without great success. So this time around, I was open to putting down almost entirely clover seeds.
We got these clover seeds (also available on Amazon) after reading many recommendations on Reddit. Some folks swear by microclover, which is supposed to grow to only 4-6 inches tall and could lessen the need to mow. Their leaves are also smaller, which help to create a dense and lush lawn. Microclover does tend to be more expensive, and I’ve read mixed reviews on how small and tall microclover actually turns out to be (though this might have to do with the seed company), so we went with the cheaper regular-sized white Dutch clover instead.
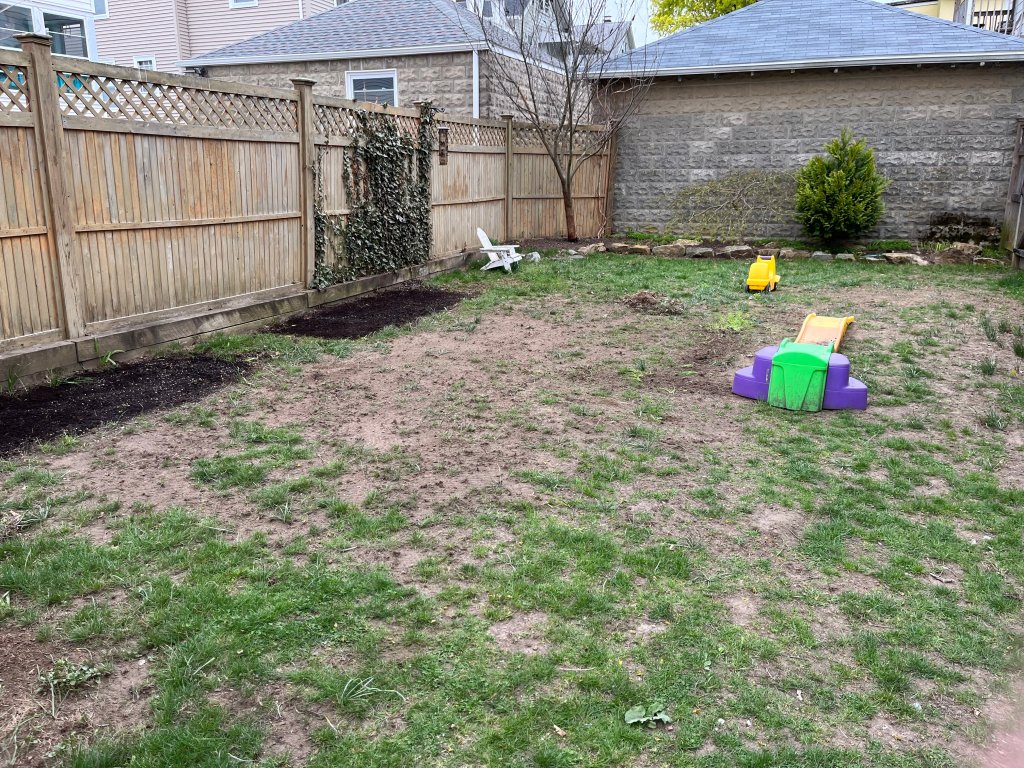
To prep the area, we first had to deal with an invasion of star of Bethlehem. They came out of nowhere, and the clusters were forming all over our yard. My mom happened to be in town, and was happy to help me dig them up in lieu of using herbicides (booo). This task took an entire weekend! Ooph, my back hurts from just reliving the memory.


Left: Mom digging up all the star of Bethlehem (we tried all the methods: pulling, digging with a shovel, and this weed removing tool). Right: the enemy.
Next step was to apply compost in all the areas we planned to spread clover seeds. Having a two year old and working full time meant I only had small chunks of time here and there, so I did this one small section at a time.


View from the side yard. It was in slightly better shape than the backyard, so we mainly filled in areas that were bare
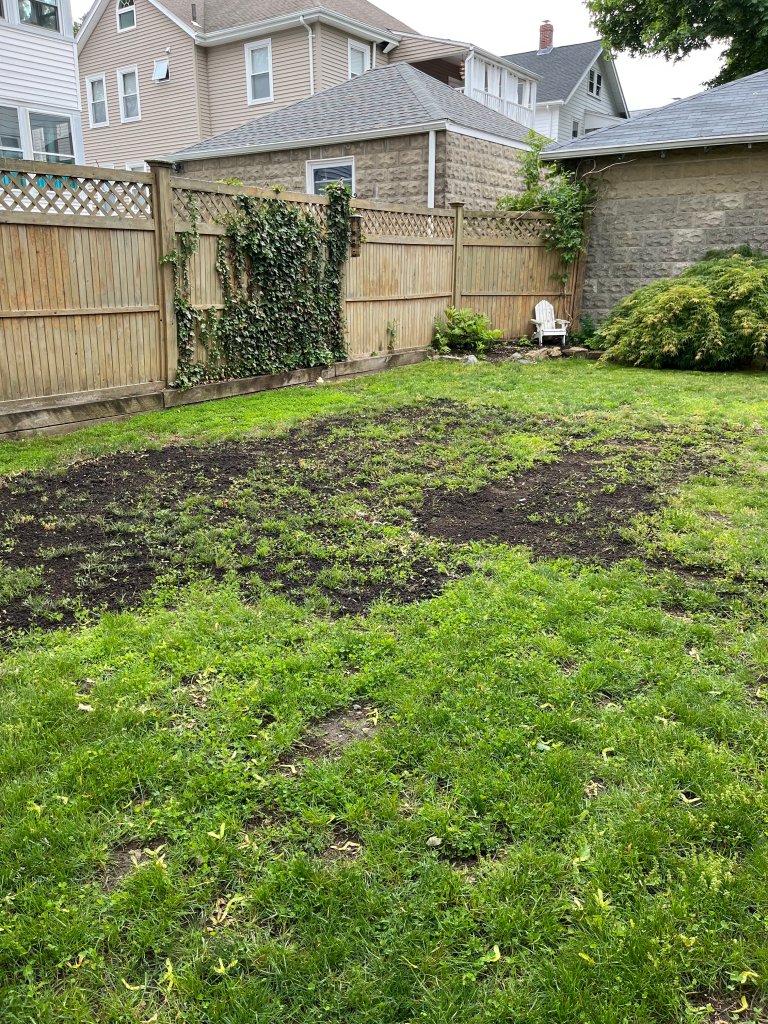
After applying compost, it was time to spread seeds. I forgot to take photos of this stage, but my advice is to spread a lot more than you think you need for a couple of reasons. 1. You want the lawn to look dense! 2. Not all seeds will germinate; 3. BIRDS. My husband was much more heavy handed than me, and the difference was stark! You’ll see below that the photo on the right (the section where my husband spread seeds) looked much better than the section I did (left). Not all is lost though if you make this mistake – clover comes up quite fast and you can also spread more seeds!

After spreading seeds and racking them in came the tedious part: keeping the soil moist until the seeds germinated. This spring was fairly dry, so I found myself out there nearly every day watering. (If you have a sprinkler system, this step should be much easier.) Thankfully, clover germinates quickly so this task should only last a week or so (unless you are like me, planting in sections, which seriously dragged out the process lol).

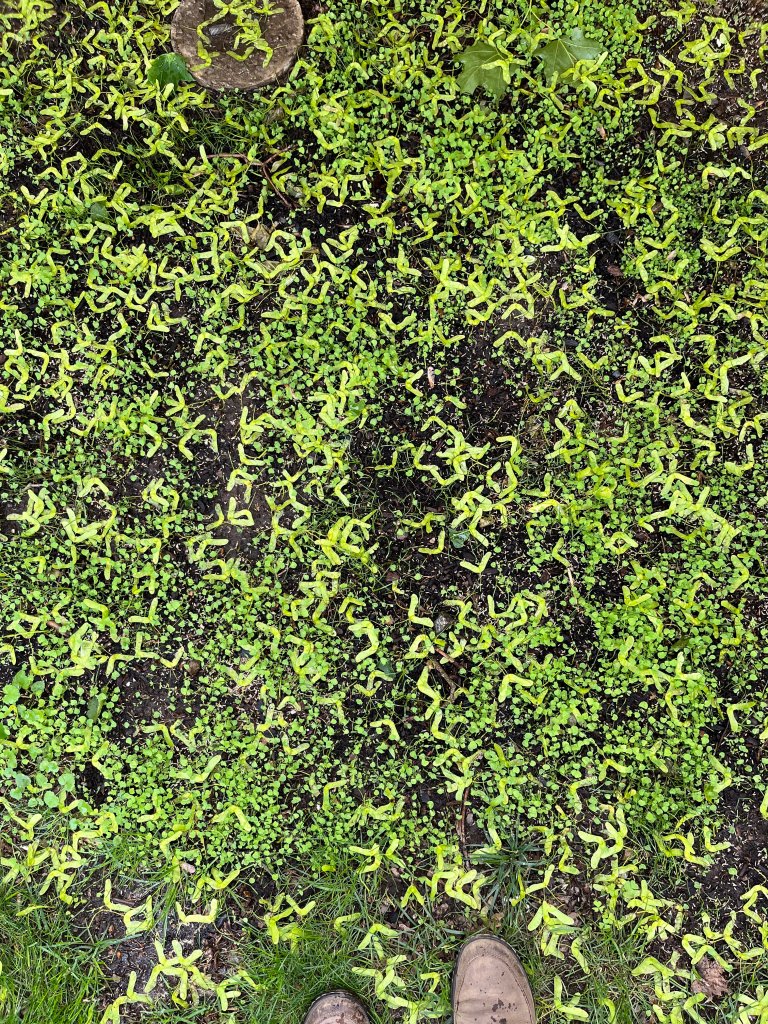
Left: April 29th, side yard: it only took 7 days for the first batch of seeds we planted to germinate. Right: June 4th, backyard was looking good! The areas left bare by the raised beds were starting to fill in and I planted the middle section
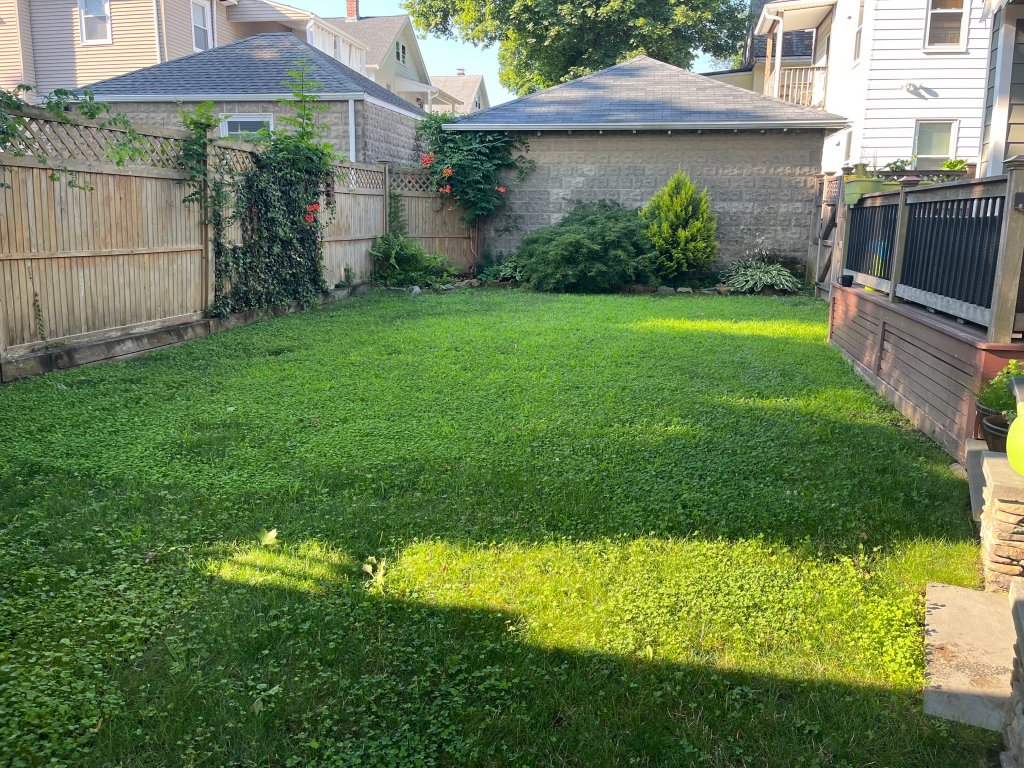
Once the seeds germinated, things were easy peasy! Clover requires little water, and given the extremely wet summer we had, we did not once water the lawn. We still mowed it each week, but we easily could have reduced the frequency to every other week. By July, the lawn was lush and green (see header image for how the lawn looked on July 28th!)


Left: July 28th close up – some grass from prior years and new clover. We didn’t plant the long bladed grass up top (the internet tells me it’s called St Augustine grass) but it also helped to fill up the lawn. Right: side yard view on August 9th

Closing thoughts
That is it! As you can see, starting a clover lawn is slightly harder than “tossing a handful of seeds and hoping for the best”, but it’s really no different than growing anything else. All it takes is some time and effort, particularly at the beginning of the season. I have heard that clover can’t handle heavy foot traffic as well as traditional grass, but this hasn’t been an issue for us. (Though to be fair, we don’t you know…play soccer in our backyard.) I am eager to see how the lawn looks next spring, as I’ve read the clover lawns may need to be reseeded every 2-3 years.
Hope this is helpful; feel free to leave questions in the comments if you are thinking of planting a clover lawn come spring!
One year update
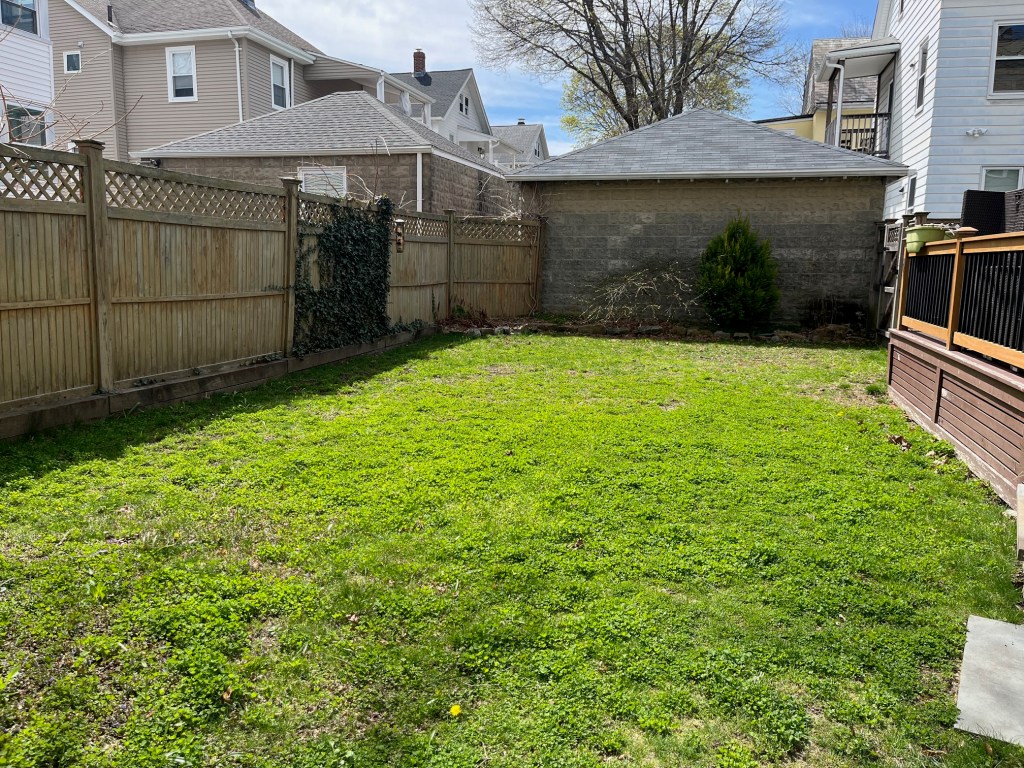
Hey! I’m back here on Apr 18 the following year with a one year update. The lawn is looking pretty good – I would say 70%+ of the lawn is covered. The areas where the St Augustine appeared all by itself last year are pretty bare so I’m planning to reseed those parts of the yard. See photos below!


Leave a reply to Mickey Cancel reply