
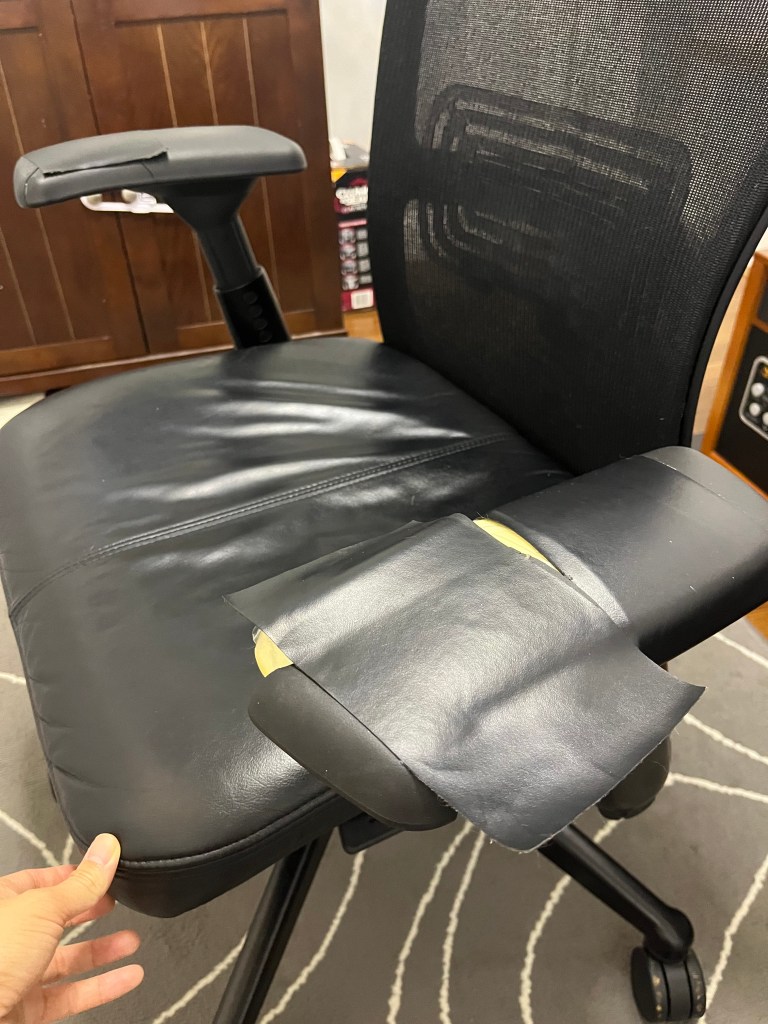
My partner scored this amazing used office chair when we set up our work-from-home space a few years ago; over time however, the leather on the armrests started to tear. At first I tried to cover up the damages with self adhesive leather patches, but eventually those stopped working too. Here was how the chair looked as of last week: it was bad.

I’m not the craftiest person, but I looked up some tutorials and thought this was a project that I’m probably capable of. I ended up documenting the whole process, though the lighting is bad in all the photos because I was working on this after bed time 😂
Here is how it went!


The first task was to take the armrests off. Mine only had one screw on each.


Next I removed the leather covers by plucking out all the staples with a plier.


Then I went searching for leather scraps. I ended up getting this used leather jacket from the thrift store and cut up the sleeves. (Even though I got this jacket specifically to repair the chair, I did hesitate for a solid 5 minutes before going to town with scissors – it was a really nice jacket!)
Once I had the right sized pieces, it’s time to staple the pieces on the armrests. If you are doing this and have a better staple gun than mine, the process should go more smoothly – mine was just barely strong enough to punch through the leather and the plastic. It’s also my first time doing any type of upholstery project, so the results looked pretty rough. See photo on the left for how they turned out – I did have to redo a part of it (where I circled) to be able to fit that armrest back in the chair. But once I re-attached the armrests back on the chair, the imperfections around the edges were pretty unnoticeable.


Overall thrilled with how they turned out! (And there is still plenty of leather scraps left for future projects 🙂 )

Leave a comment